When life gives you lemons, make marmalade

We’ve been quiet on the blog front for a while, but a lot has been happening on the personal front. The biggest change for me has been with work: as of September, I am no longer spending half my life in Asia — and my carbon footprint has shot down to human proportions.

Meanwhile, thanks in part to our ratty neighbours and compost challenges, Bonnie Lee has gone on a quest to create a local composting solution for multifamily dwellings, which has led to two things: she is working with LA Compost to bring a solution to Palms, and has become a member of the Palms Neighborhood Council Green Committee.

We’re also both members of the Technology Innovation Council which the USDA asked the folks at Food Cowboy to set up.

With all that going on, maybe we can be excused for having allowed two lemons to start looking a little dry — two lemons for which we had no immediate plans. We also had a big, sweet navel orange sitting around, so decided to try our hand at marmalade.

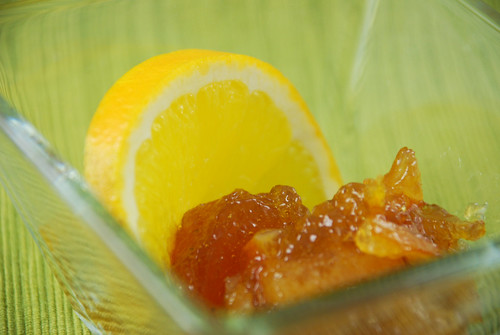
Home made marmalade

‘Twas lovely with breakfast

Orange and lemon marmalade (about 3 cups)

Ingredients

  • 3 small lemons (two of which were looking a bit, but not overly, dry)
  • 1 large Valencia orange
  • 3 cups water
  • 2.5 cups sugar

Directions (in pictures)
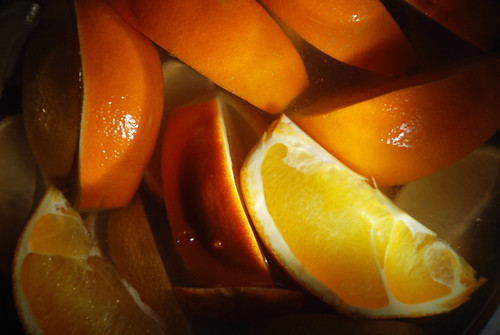
Future marmalade

1. Cut each piece of fruit into 8 wedges. Remove the seeds and drop wedges in a pot. (Tip: hold each wedge up to the light to make sure you got all the seeds.)
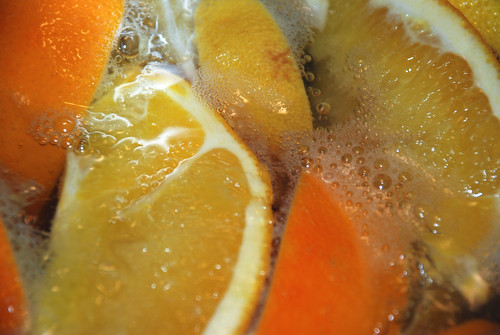
What the bells of Saint Clemens said

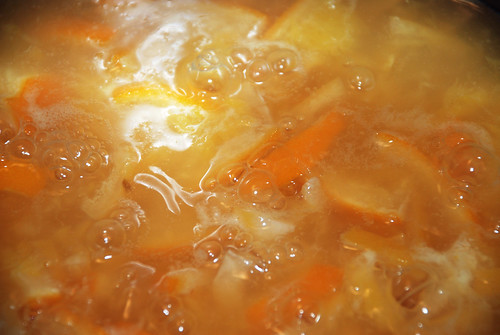
2. Cover with water, and boil for five minutes.
3. Turn off heat, and let sit covered overnight (for at least 12 hours)
Boiling away

4. Remove wedges from liquid (and leave the liquid in the pot — you will need it).
5. Cut each wedge crosswise into thin slices, and return to the pot.
6. Boil for one hour.
Testing

7. Add sugar to boiled fruit mixture. Basically, you should be adding the same volume of sugar as you have fruit mixture, but we used a little less. We had 3 cups of mixture at this point, and used 2.5 cups sugar.
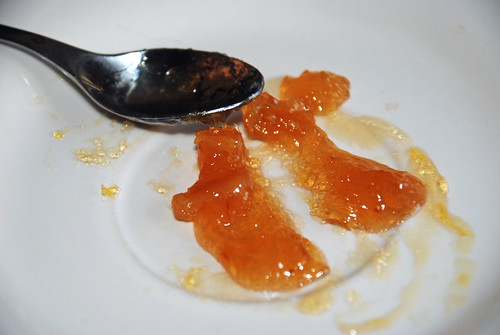
8. Continue to boil, occasionally spooning some of the mixture onto a plate, letting it cool to room temperature, and running a spoon through it. When you get something with the consistency shown in the picture above, you’re done.

Leftover Butternut Squash Smoothies

Last night I roasted a whole butternut squash that has been in the fridge for nearly a month. It was a smallish squash, less than two pounds, but I still had two cups of leftover squash at the end of dinner.

As I stared at the remaining, flesh and the two bananas on the counter, I dreamt about breakfast. (Yes, I know, a full tummy and I can still daydream about my next meal.) Would a squash and banana smoothie be tasty?

Turns out yes, and I am not the first to pair the two. I googled and found two recipes that piqued my interest:

  • On the food blog, Perks of Being a Foodie, I found recipe that spiced up the smoothie so the author could get her pumpkin fix. And,
  • And VideoJug shows how to combine juice, bananas, and squash into a smoothie that kids will drink up.

Since I find the squash and banana sufficiently sweet, I omitted the honey and simply combined a banana, a cup of butternut squash, and some almond milk with ground cinnamon, ginger, and nutmeg. I suspect you can add any combination of spices. Any takes on a madras banana and squash smoothie?

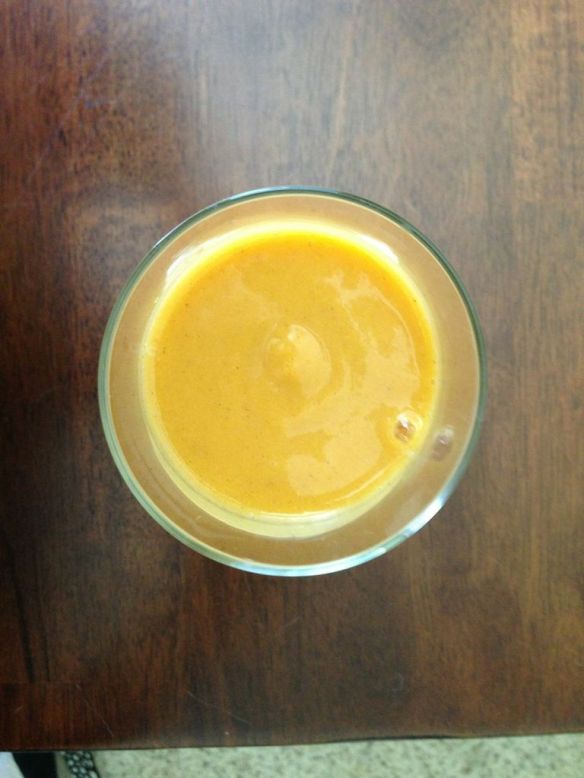
Spicy squash & banana smoothie

Spicy squash & banana smoothie

In my research, I found a few other creative ideas that involve butternut squash. I did not want a pie or soup or gnocchi treat. Two recipes in that search have me thinking of new sauces and veggie ideas that go way beyond the squash.

Oh, and if you are wondering about our zero waste goal: I will eat the whole squash. Seeds can be roasted and the skin is edible. Simply roast your squash whole in the oven with a bit of oil and salt on the skin and you will have a tasty nosh that is 100% edible. I like it almost as much as baked potato skins.

Eggless, Yeastless Yummy “Stone Soup” Bread

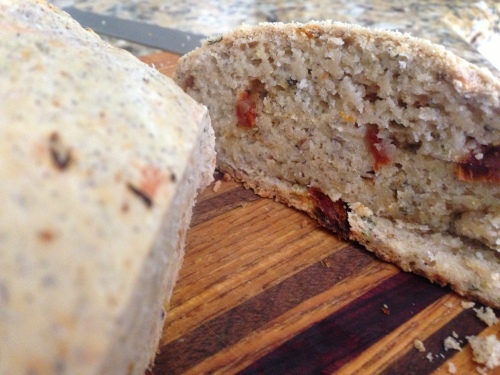
Vegan bread with sun-dried tomatoes, onions, and sage.

Vegan bread with sun-dried tomatoes, onions, and sage.

In our new apartment, I want to have a “Zero Waste Kitchen”, but that means I have to use up as much as possible in the current apartment before we move. The idea is to start with a clean slate. To do that we need to make sure we do not bring bad habits with us. Today, I made bread, and in the process used up the last of our sun dried tomatoes, blue corn flour, extra jar of white four, and baking powder – as well as some almond milk. What I got, had the texture of a nice country loaf.

And it was 100% vegan.

Why Stone Soup Bread? Because, like Jean-Francois’s idea for stone soup, this recipe is so flexible that practically anything can go into it, and it complements salad or soup, and makes a nice sandwich. You could even use stone soup broth in the mixture. Best of all, I doubt I will ever miss traditional breads ever again.

I cannot take credit for the idea. I found the source recipes on the internet when searching for ways to use flour without eggs and yeast. I have Tish’s recipe at Food.com, Veggie Bon Vivant’s adaptation of Mark Bittman’s (How to Cook Everything), and a half day of looking at nearly empty jars and wondering what would work together.

Here’s what I did:

  1. Preheat over to 400F.
  2. In a large bowl, mix 3 cups of a variety of flours (blue corn, unbleached, corn meal, and whole wheat) with 1 tablespoon baking powder and 1 teaspoon salt.
  3. Chop 4 withering green onions and about 1/2 cup sundried tomatoes (in oil) and add them to the flour mixture. NOTE: I chopped the tomatoes on a wooden chopping board and left the oil on the board to use later when shaping the bread dough.
  4. Add 2 teaspoons dried sage to the flour mixture. Any herb would work, be creative.
  5. In a 2 cup measuring cup, combine 1/4 cup olive oil and 1-1/2 cups almond milk.
  6. Add liquids to flour mixture and mix until flour is moist but not very sticky.
  7. Turn dough on to wooden board (the one with the tomato oil). Flip a few times to shape into a ball.
  8. Drop ball onto baking sheet.
  9. Cook for 45 minutes.
Just out of the oven, not the blue colour from the blue corn flour.

Just out of the oven, note the blue colour from the blue corn flour.

And voila, two veggies saved from compost, three jars empty and ready to be packed, and a nice hearty snack to get me through the afternoon. I suspect this bread will toast up nicely and make heavenly croutons, too.

Frozen Food Month: Celebrating with Bananas, Rhubarb, & Strawberries

My task list and I have a passive-aggressive relationship. I look to my Reminders app to help me remember things I must do, but get angry each time a reminder pops up on my calendar, iPhone, and tablet. I mean, the app is stalking me. Nagging me.

It nags me to write-up the recipes for the dips and dishes we served at a party way back in early January. It reminds me to take photos of our Japanese lantern inspired compost bin (inside and out) and write about lessons learned. It reminds me … sorry, I am sure you don’t care about my relationship with my task list. I never seem to cross things off. With each new, yummy success, I find it harder and harder to revisit the meals and food waste ideas we tested last December and January. But I will get to time someday.

But today’s entry is based on a treat that is too good to wait. And seasonal. It combines a springtime favourite of ours, rhubarb, with strawberries and frozen bananas. Its vegan. It healthy. Its easy. And, its yummy. What is it?

Mock Vanilla Ice Cream with warm Strawberry-Rhubarb Compote

Mock Cream with Compote

Make the compote first. If you are fans of rhubarb, make lots. It can be used on toast, mixed with yogurt and muesli, added to muffins and smoothies, and served with pork and chicken. We also make a crumble with the compote that Jean-François devours. The compote is a great way to save fruits and berries that are showing their ages.

Also, we freeze bananas. Every banana that enters our home is immediately stripped and frozen. This is a great way to keep fruit flies at bay and have bananas on hand when you need them for pancakes, smoothies, breads, and mock-ice cream. If you do not do this, put one unpeeled banana per person in this freezer at least three hours before making this  dish.

For the compote:

  • 8 oz. fresh Strawberries, washed with tops removed, and quartered
  • 6 stalks of Rhubarb, washed and chopped into 1/4 inch slices
  • 1 cup fresh Orange Juice (with lots of pulp)
  • 3 tablespoons Coconut Sugar (Honey would also work if you are not vegan)

Combine all ingredients in a saucepan. Cover and let sit for 2-3 hours until the rhubarb sweats and the strawberries begin to release their juice.

Bring fruit mixture to a simmer on medium low. Simmer until rhubarb is very soft. Remove from heat and set aside.

Mock Vanilla Ice Cream

To make the mock-vanilla ice cream:

  1. Remove one Banana person from the freezer
  2. Slice Banana(s) into 1/2 inch discs. (This is highly advisable, or you risk damaging a beloved household appliance.)
  3. Add Banana(s) to food processor, mini-prep, or blender with a good dose of Vanilla (we added 1 Tablespoon per person) and a tablespoon of the juice from the compote.
  4. Pulse until creamy.

Spoon the mock-ice cream into bowls. Top with compote. Enjoy.


Feasting on Leftovers: A little pesto goes a long way

Jean-Francois arrived from Singapore on Saturday last with renewed energy and a clear goal: Complete our vegetarian cookbook in six weeks. But that requires a clean kitchen and an empty fridge. To prepare, I made all our meals with an eye to waste nothing and have no food in our home by the end of the week.

For the most part our meals at home are vegetarian. Not vegan, but meat is rarely on the menu. This week was no exception, save for an evening of miso-glazed halibut (wild caught from Alaska, approved by our Seafood Watch app) and served with flavoured rice and lemon roasted brussels sprouts.  I only mention this meal, because it is the trigger for what follows.

I had leftover rice and sprouts from that meal, so for last night’s dinner I wanted to give these morsels a second chance to dazzle. And use up some aging produce. Here is what I did.

Menu, Leftovers for two:

Pesto Blessed Leftovers

  • Vegetarian Meatballs  with okara (not egg) (recipe from The Meatball Shop)
  • Asparagus with lemon butter sauce (14 stalks)
  • Pesto Fried Rice with brussels sprouts, peppers, and onions
  • Blue cheese basil pesto

Everything but the asparagus was either a leftover or on its way out the door. (Note: I made the meatballs about six weeks ago and froze them in batches of 6, we thawed our last bag for future meals.

1. Warm the meatless meatballs.

Preheat over to 350F. Place meatless balls in baking dish, cover tightly to prevent drying.  Heat in over about 20 minutes, until heated through.

2. Prepare the pesto, add:

  • 2 1/2 cups fresh basil leaves
  • 1/2 cup of cashews
  • 1/2 cup olive oil
  • 2 cloves garlic
  • Salt to taste
  • 2 oz. blue cheese

To food processor and pulse until it becomes a coarse paste. Set aside.

3. Start the rice, Cook:

  • 1/2 onion, chopped fine
  • 1 green bell pepper, chopped fine
  • 2 cloves garlic, crushed

In a skillet with 1 Tablespoon olive oil, until onions start to brown. Add:

1 1/2 cups leftover rice (no need to be exact) and leftover brussels sprouts. Stir until hot. Add:

  • 2 gobs of pesto
  • Salt to taste

Set aside until ready to serve.

4. Pan-fry prepared asparagus in a bit of olive oil over medium heat

Until browned, about ten minutes. Turn off heat and add 1 tablespoon fresh lemon juice and 1 tablespoon butter and toss until sauce coats stalks evenly. Serve.

The pesto also serves as a dipping sauce for the meatballs. Jean-Francois topped his rice with the lemon-butter sauce.

Comments on the meal: 

  • We thought the blue cheese might over power the pesto, but the two were very nicely paired. We will use the remainder of the pesto with pasta on Saturday.
  • The rice was rather tasty.
  • We had enough fried rice leftover to make an egg hash for breakfast. Just add two eggs.
  • Those meatballs are very dry, made more so by the freezing. Considering the long list of ingredients and the time required to prepare them, you will want to make sure you find ways to “pimp them out”. The recipe makes 24 balls, which is a lot for two people. And since I am not a fan of lentils, I doubt I will be making these again.

All told we managed to eat every bit of veg in the fridge. When we shop on Saturday, it will be like starting with a new fridge.

On another note: I am in search of muslin cotton for making tofu and soy milk. My supply has turned to rags and I cannot find any cheesecloth here that is fine enough. If anyone can point me to a decent vendor, I would be over the moon. We miss our tofu and milk. Thanks.

Stone soup dahl

About a month ago, I wrote an entry on what I call stone soup. The recipe in that entry is simple:

…whenever I peel or chop vegetables or meats, I toss any bits that would usually be destined for the compost or garbage bin into a colander, wash them, then put them in a container in the freezer.  When I want to make stock, I throw the stone-like frozen scraps into water and boil.

As one friend noted, though, “Ive started my stone soup freezer bag! Once you start, it grows quickly!” Very quickly – and the challenge is to find varied ways to use up all that stock (we end up making about 8 cups of it every weekend). Last week, I did something based on this great dahl recipe from  Wolfgang Puck, and it’s definitely a keeper.

For the version I made, I used brown lentils, rather than orange ones – and stone soup stock rather than chicken stock. The stock that week was made with a healthy amount of beet peelings, and was dark colored with earthy tones, which worked perfectly in this recipe. I served the dahl with some homemade dosa (a rice and lentil batter pancake), kale salad, a spicy coleslaw, and some watermelon rind chutney – a satisfying, warming meal.

One thing to note: unless you’re catering a wedding, I suggest that you make about a quarter of the recipe at the link. That makes about 4 normal sized servings.

Saag

Indian mealThere are few things I like more than a good Indian meal, and one of my favorite curries is saag. When you get it in North America, it’s usually made with spinach, but it can be made with any green or mix of greens – and it’s a great way to use edible greens that typically end up in the bin, like those of sweet potatoes, radishes, carrots, beets and broccoli.

I made a small batch with carrot greens the other night, which I served with roasted carrots and red peppers, tandoori chicken, watermelon rind chutney and turmeric rice – a meal just overflowing with complex spices and aromas.

Carrot green saag (two small servings)

Ingredients

  • 1 tsp cooking oil
  • 2½ oz onion, diced
  • 1 poblano chili, seeded and diced
  • 1½ tsp grated ginger
  • 1 small clove garlic, crushed
  • ¼ tsp coriander
  • ⅛ tsp turmeric
  • 2½ oz carrot greens, coarsely chopped
  • 2 Tbsp yogurt (optional)
  • ⅛ tsp salt, or to taste
Directions
  • Sauté onions in oil over medium heat until they’re translucent.
  • Add in the chili, ginger, garlic, coriander and turmeric, and sauté until your kitchen smells good – about one minute.
  • Add in the carrot greens, and sauté for about 2 minutes.
  • Add enough water to cover the greens, and bring to a boil.
  • Reduce heat, and let simmer until carrot greens are tender – about 10 minutes.
  • Remove from heat, let cool (so you don’t blow the lid off of your blender with steam), and blend until homogenous.
  • Return to heat, and warm to serving temperature.
  • Stir in yogurt and salt.
I served roasted vegetables on top of this batch, but you can also stir in cooked potatoes, chicken, chickpeas, paneer (an Indian cheese) – or just about anything else.
Fun facts
Edible greens rescued from landfill per serving 1.25 oz
Number of servings needed to save 1 pound of edible greens from landfill 12.8
Cost of 1 pound of edible greens which would usually be tossed $0.00
Cost of spinach at yummy.com as of 1 minute ago $3.99 for 5 oz
Amount you can save by replacing 1 pound of baby spinach with free edible greens (assuming you shop at yummy.com) $12.77
Net impact on landfill if everyone in the US eats 1 pound of greens that would usually be tossed 155,000 short ton reduction
Total cost of that 155,000 short tons of green goodness $0.00

Save Something from Landfill Day

As one commenter pointed out, today is 2/22 (thanks, Mami), which cries to be a special day on this tiny sliver of the web. Maybe when the 222 million tons Facebook “likes” swell to numbers well beyond the current 11, I’ll have the clout to lobby for February 22 to become International Save Something from Landfill Day. Until then, I’ll just have to try making a small dent in the problem by sharing observations like this one: beet leaves and stems are tasty.

Beet green linguine

They’re often overlooked for the same reason that watermelon rind is; they live next to a real attention grabber – in this case beets. But beet leaves are tender and flavorful, and their stems are red, crisp, and have just a hint of beet flavor. Unlike beets, they don’t overwhelm, but they do add color and character to salads and other dishes.

Our most recent experiment with beets greens was a linguine with beet greens, which was good enough to share here.

Linguine with beet greens (serves 1)

Ingredients

Linguine with beet greens

  • 2 oz linguine
  • 1 tsp olive oil
  • 1 tsp fresh garlic
  • ¼ onion
  • 5 button or crimini mushrooms
  • 5 sun dried tomatoes (the ones packed in oil)
  • 1 tsp oil from sun dried tomatoes
  • 10 oz beet leaves with stems
  • 1 pinch salt, or to taste
  • ¼ tsp pepper, or to taste
  • ¼ tsp dried chili flakes, or to taste
  • ½ oz crumbled goat cheese

Directions

  • Fill a pot with water, and bring it to a boil.
  • You’ll be lightly sautéing the vegetables for this dish, and don’t want things to over cook while you’re busy practicing your knife skills or hunting for spices, so it’s best to do all the slicing and dicing up front. So, as the water comes to a boil:
    • Crush the garlic.
    • Slice the onion.
    • Clean and quarter the mushrooms.
    • Slice the sun dried tomatoes into strips.
    • Wash the beet leaves, remove their stems, and chop them into one- or two-inch lengths.
    • Slice the beet leaves crosswise into ¼ inch strips.
    • Crumble the goat cheese.
    • Get your spices ready.
  • By now the water should be boiling, so prepare the linguine according to the package directions. While that is cooking, you can cook the vegetables.
  • Heat the oil in a skillet over medium heat, and sauté the onions and garlic for two or three minutes, until the onions are translucent.
  • Add in the mushrooms, sun dried tomatoes and sun dried tomato oil, and sauté for two minutes.
  • Add in the beet leaves, and sauté until they start to wilt.
  • Throw in the stems, and sauté until they have imparted their color to the mushrooms and onions. Be careful not to over cook them, though, or they will become brownish and lose their crunch.
  • Remove from heat, and add salt and pepper to taste.
  • By now your linguine should be ready. Plate it, and top it with the sautéed vegetables.
  • Sprinkle with chili pepper flakes and goat cheese (I did that after I took the pictures).
Fun facts
Reduction in food waste per serving 10 ounces
Reduction in food waste if every person in the developed world saves just 10 ounces of beet greens from landfill About 312,500 short tons
Weight of pig iron structure of the Eiffel Tower About 8,000 short tons

Watermelon rind is food too

Watermelon rind has it tough. It lives next to sweet, pink, refreshing fruit that can be eaten as is, or easily become the base of colorful drinks, salsas, granitas and soups. How many of us even acknowledge rind as food? How many of us stop eating when we reach the unsexy, white, flavorless stuff? How many rinds end their lives needlessly in landfill?

Too many to contemplate.

But watermelon rind is food too, and there’s no reason to throw it away, or even compost anything but the hard, dark green skin (less than a millimeter thick). Although the rind is not as flavorful as the rest of the fruit, it is slightly sweet and has a firm, crisp texture that holds up well to cooking. It can be incorporated into the aforementioned drinks, salsas, granitas and soups — but also does well on it’s own in both sweet and savory concoctions.

Watermelon rind chutney

Take that, sexy, pink, attention-grabbing watermelon flesh

I’ve been in the mood for Indian food lately, so when I found myself with 10 cups of watermelon rind earlier this week (harvested from a 7 pound watermelon), I decided to use it to make chutney. The recipe is below, and the result is a spicy, sweet, sour, aromatic condiment that makes a perfect accompaniment to Indian food, meat dishes or strong cheeses.

Watermelon Rind Chutney

Ingredients

Cubed watermelon rind

Cubed watermelon rind

  • 10 cups watermelon rind, diced in ¾ inch cubes with dark green skin removed
  • 2 cups raisins
  • 2 serrano peppers with seeds, minced
  • ½ cup ginger, skinned and coarsely chopped
  • 1½ Tbsp garlic, coarsely chopped
  • 1 tsp red pepper
  • ¾ tsp cinnamon powder
  • 
½ tsp cardamom
  • ½ tsp ginger powder
  • ¼ tsp powdered cloves
  • 1 tsp salt
  • 2 cups cider vinegar
  • ¼ cup lime juice
  • 1½ cups sugar

Directions

  • Place watermelon rind, raisins, serrano peppers, ginger, garlic, red pepper, cinnamon powder, cardamom, ginger powder, powdered cloves, salt and half of the vinegar in a large pot.
  • Add enough water to just cover the fruit, and give everything a good stir.
  • Bring the liquid to a boil, then immediately reduce heat to low.
  • Cook on low heat for 1 hour, stirring occasionally, until the rinds take on a translucent quality.
  • Add in the rest of the vinegar, the lime juice and the sugar, and stir until sugar dissolves.
  • Bring the liquid to a gentle boil, and, stirring frequently, continue to boil until the liquid has the consistency of jam.
  • Put the chutney in a sterilized jar.

This chutney will stay fresh for several months in the refrigerator.

Fun facts
Reduction in food waste per batch of chutney 10 cups
… and if every household in the US makes 1 batch Over 9.6 million cubic feet
Volume of the Washington Monument About 1 million cubic feet

Eating green

Last April, I bought some carrots.

I had just moved to the United States, and unlike the thick, woody carrots at our local market in Japan, these were small, organic, and topped with lush greens. They smelled earthy and fresh, and in the tradition of millions of grocery unpackers before me, I twisted the greens off to keep the carrots fresh longer. I was about to throw those greens away when a question stayed my hand:

Are carrot greens food?

Moving to California (a land of cheap, fresh food sold in massive quantities) had made Bonnie Lee and I keenly aware of how easy it would be to waste food here — something we were determined to avoid — and a quick search on the Internet told me that carrot greens are one of the many foods most people feed to the bin rather than to themselves. It’s a shame. Although they lack many of their bright orange roots’ charms, carrot greens have a distinctive bitterness that can add an unexpected accent to a meal, and which balances nicely with other strong flavours.

The first bunch of carrot greens I rescued ended up in some chicken soup stock — and that’s the way I use them most often. They add a layer of complexity to stock, and a healthy greenish tinge, though you still end up with solid waste when you use them that way.

My latest experiment with carrot greens was the Purée of the Whole Danged Carrot Soup (recipe below) that I made for lunch yesterday. I balanced the bitterness of the carrot greens with a good dose of white pepper, and some cider vinegar and honey. I decided not to blend the soup completely, so that little specks of green and orange would still be visible. That gave the soup a bit of crunch and freshness that I liked, but I can see some folks being put off by the texture. For a smoother version, I would suggest throwing a couple of ounces of cooked potato into the mix, and blending the soup more throughly.

Carrot greens also make a good addition to salads, and there are a few recipes for carrot green pesto out there (though I’ve yet to try those). Feel free to share any carrot green recipes, or improvements to my recipe, in the comments.

Purée of the Whole Danged Carrot Soup (1 serving)

Ingredients

Carrot greens are food too

  • 1 tsp olive oil
  • 4 oz carrots (diced finely)
  • 3 oz onion (diced finely)
  • 1 clove garlic
  • 1 cup chicken stock
  • Greens from carrots used above (diced finely, except for 1 sprig to be used for garnish)
  • 1 tsp honey
  • 1 tsp cider vinegar
  • ¼ tsp white pepper
  • ⅛ tsp salt (or to taste)

Directions

  • Sauté the garlic, onions and carrots in the olive oil over medium heat, until the onions are translucent.
  • Add in the chicken stock and carrot greens, and heat until carrots are tender.
  • Remove soup from heat, and purée using hand mixer or blender.
  • Add in the honey, vinegar, salt and pepper; stir well, and warm soup back up to serving temperature.
  • Plate and garnish with carrot greens.
Associated reduction in the 222 million tons of waste produced annually
Per serving about 1 oz (the weight of the greens, assuming you would have eaten the carrots anyway)
If you eat this once a week 3¼ pounds per year
If everyone in the US eats this meal once over 9,500 short tons
If everyone in the US eats this meal once a week close to 500,000 short tons per year